


Some of the links below are affiliate links, meaning, at no additional cost to you, I may earn a small commission from the sale if you click through and purchase.
Do you label every quilt you make? I have to be honest... I don't! If this is the first you're hear about labeling your quilts here is article with a full history. We really should label the quilts we make though! Imagine years down the road, someone finds this quilt but has no idea why it's so special, who it was made for or who it was made by.
Today I am sharing a quick and easy way to label your handmade quilts! Let's jump in.
There are a lot of different options for labels! Here are just a few I have tried in the past:
- Custom order tags
- Custom order ribbons
- Hand written
- Printed
- Sewn into the corner
- Sewn on as a patch

When I first started quilting I labeled my quilts by hand! You can use some of these archival pens to write a label and then applique it onto the back of your quilt. Hot tip - tape your fabric onto some lined notebook paper or graph paper to keep all your words in line! (The pens above say they are not recommended for fabric, but I've used them on fabric and it's been fine!)

(I'm just realizing in this moment I have been quilting for almost twenty years!)
In the early days of my business I used these custom made tags that I would stitch onto the back or into the seams of my quilts. I made custom quilts, baby shoes, pillows and Christmas stockings I sold on Etsy and these labels were super simple to throw on! I found these on Etsy from another maker.

But my favorite way to label a quilt is with a printed label! I use my home printer to print on my regular, quilters cotton fabric. I'm not guaranteeing that this will work with every printer so test this out at your own risk! I'm using an older HP Office Jet printer. Here's a step by step:

Type up the words you want on your quilt label:
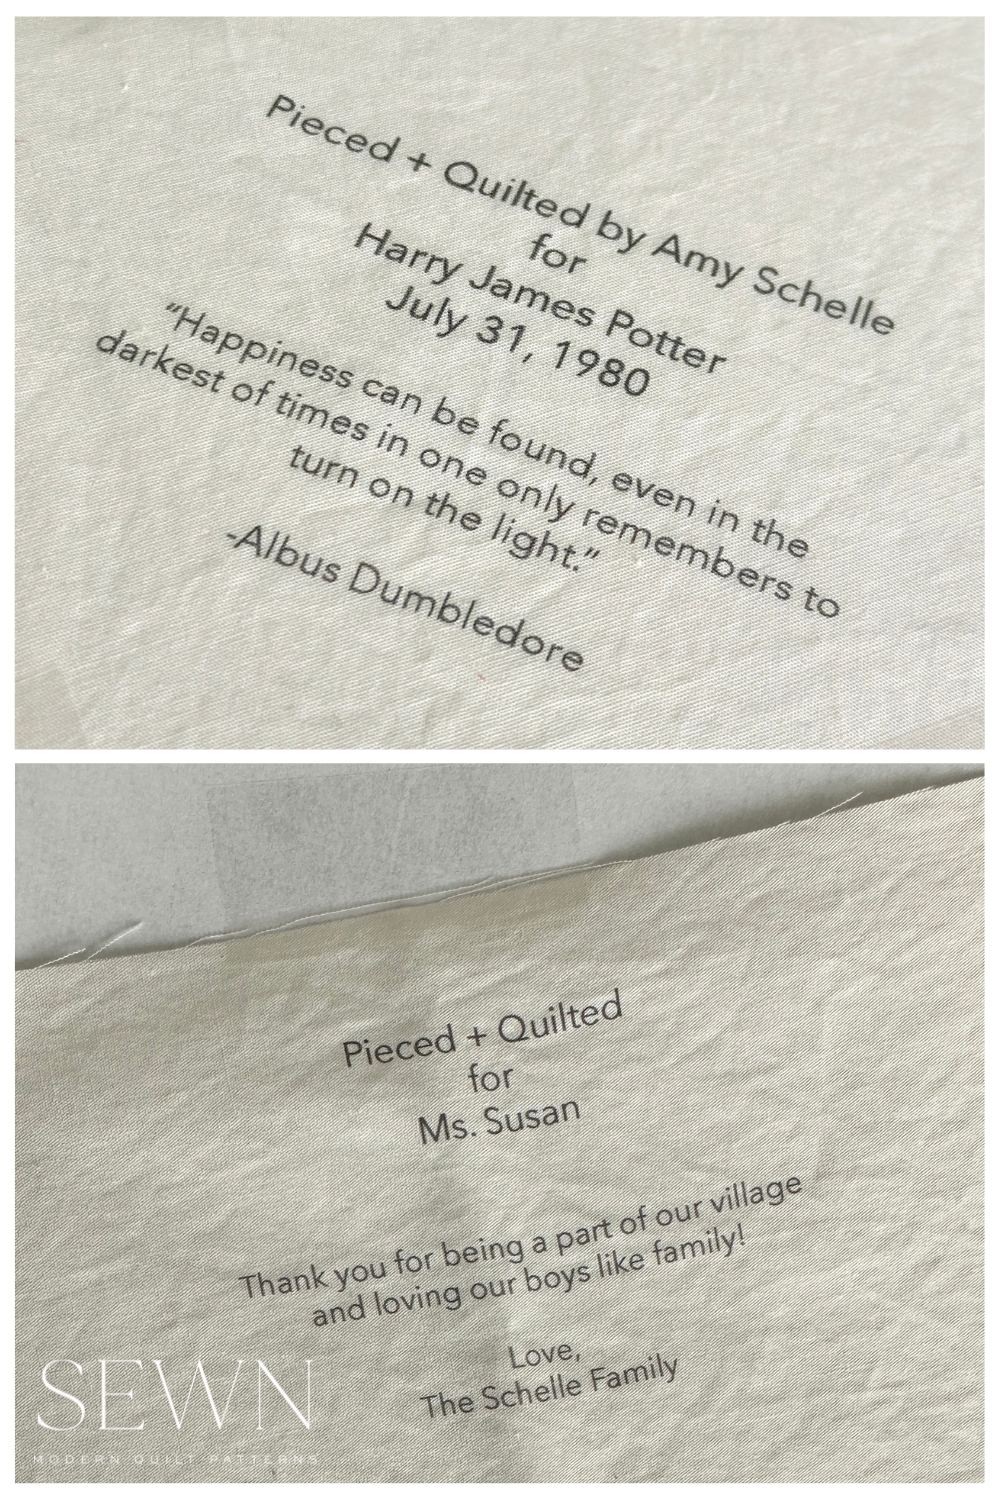
This is totally custom, but make sure you include your information as the maker on the label. For this example I'm using a favorite fictional character to show you how I typically label baby quilts. You can include some words from your own heart or your favorite quote to add a nice personal touch! The program I'm using is set for an 8.5 x 11 piece of paper, so I eyeballed the center and where I knew the fabric will be taped down. Then I typed the words. (You'll see why my text is at an angle later on!) The label on the left will be sewn into the corner and the label on the right will be applique.

Tape your fabric to your paper:
You want most of the edges fixed down and to be sure the fabric is as flat as it can be. I eyeballed the placement of the fabric based on where it is in my document but also left some wiggle room when I cut my square in case I needed to trim it once it was printed. You also need to consider how the paper feeds through your printer! Run a test sheet through to see where the top of your paper comes out.

Print your label:
You can run a test piece of plain paper through the print first to check where your fabric is located and the size of your text. Then run the paper through with you fabric taped on!

I've tried iron-on printed sheets and in my experience they just do not hold up to washes! This method words better in my opinion.
Trim and prep your label:
For this first label I am going to sew it into the corner on the back of the quilt so I pressed it in half and pinned it to my quilt.


Then when I attached the binding I made sure to catch the two raw edges with the binding so it would be sewn down.

You can hand stitch the folded edge down to finish it off or leave it open like a pocket. You're done!
(Here's a sample of what it looks like when you sew down the folded edge)

The second option is to press all four edges of the label. Next, pin it to the back side of your quilt and hand stitch around all four edges. This is more like a patch you are adding to the back.


You can also add a border if you have some extra fabric scraps laying around like I did here on these patches for our boys! I've washed these quilts several times and the ink has stayed from my printed label.

So what do you think? Ready to try this out for yourself?
You might also enjoy reading:
How to Repair a Quilt
What is Modern Quilting?
Crazy Quilts: A Family History
Great article on label making! I just tried the printer method but my ink didn’t adhere properly when I tried to erase some lines I used for hand sewn binding! So I tried fabric printer paper next. So far, so good. I just wanted to let you know you might have an oops in your triangle label, “in” might be “if”.
What program did you use?
I like your labels and your method. I would like to know how you got the text on the diagonal. I may be having a senior’s moment but I can’t picture it!
I iron a piece of letter size fabric to freezer wrap. Be careful to use an ironing cloth to cover to avoid adhesive sticking to your iron. Use a very hot dry iron, pressing all areas carefully. Let cool a bit a test to make sure the cloth has adhered to the paper. If not, press more. Trim all to letter size and feed through the printer. Iron the ink (cloth covered) to set the ink.
I usually use a corner label in my quilts. I think it’s important to add the quilt # and date, as well as my printed name and signature. Just in case I become famous someday for my art 😂